Having a waitlist page for your app is a great way to start building a user base even before you launch the app.
A portion of these users will download your app in the first days and leave a few reviews which in turn will boost organic App Store search discovery.
AppView comes with a built-in waitlist page that you can enable by toggling
the IS_WAITLIST_ENABLED constant inside the src/constants.ts file to true.
export const IS_WAITLIST_ENABLED = true;After that, run the project locally and you will see the waitlist page instead of the full layout.
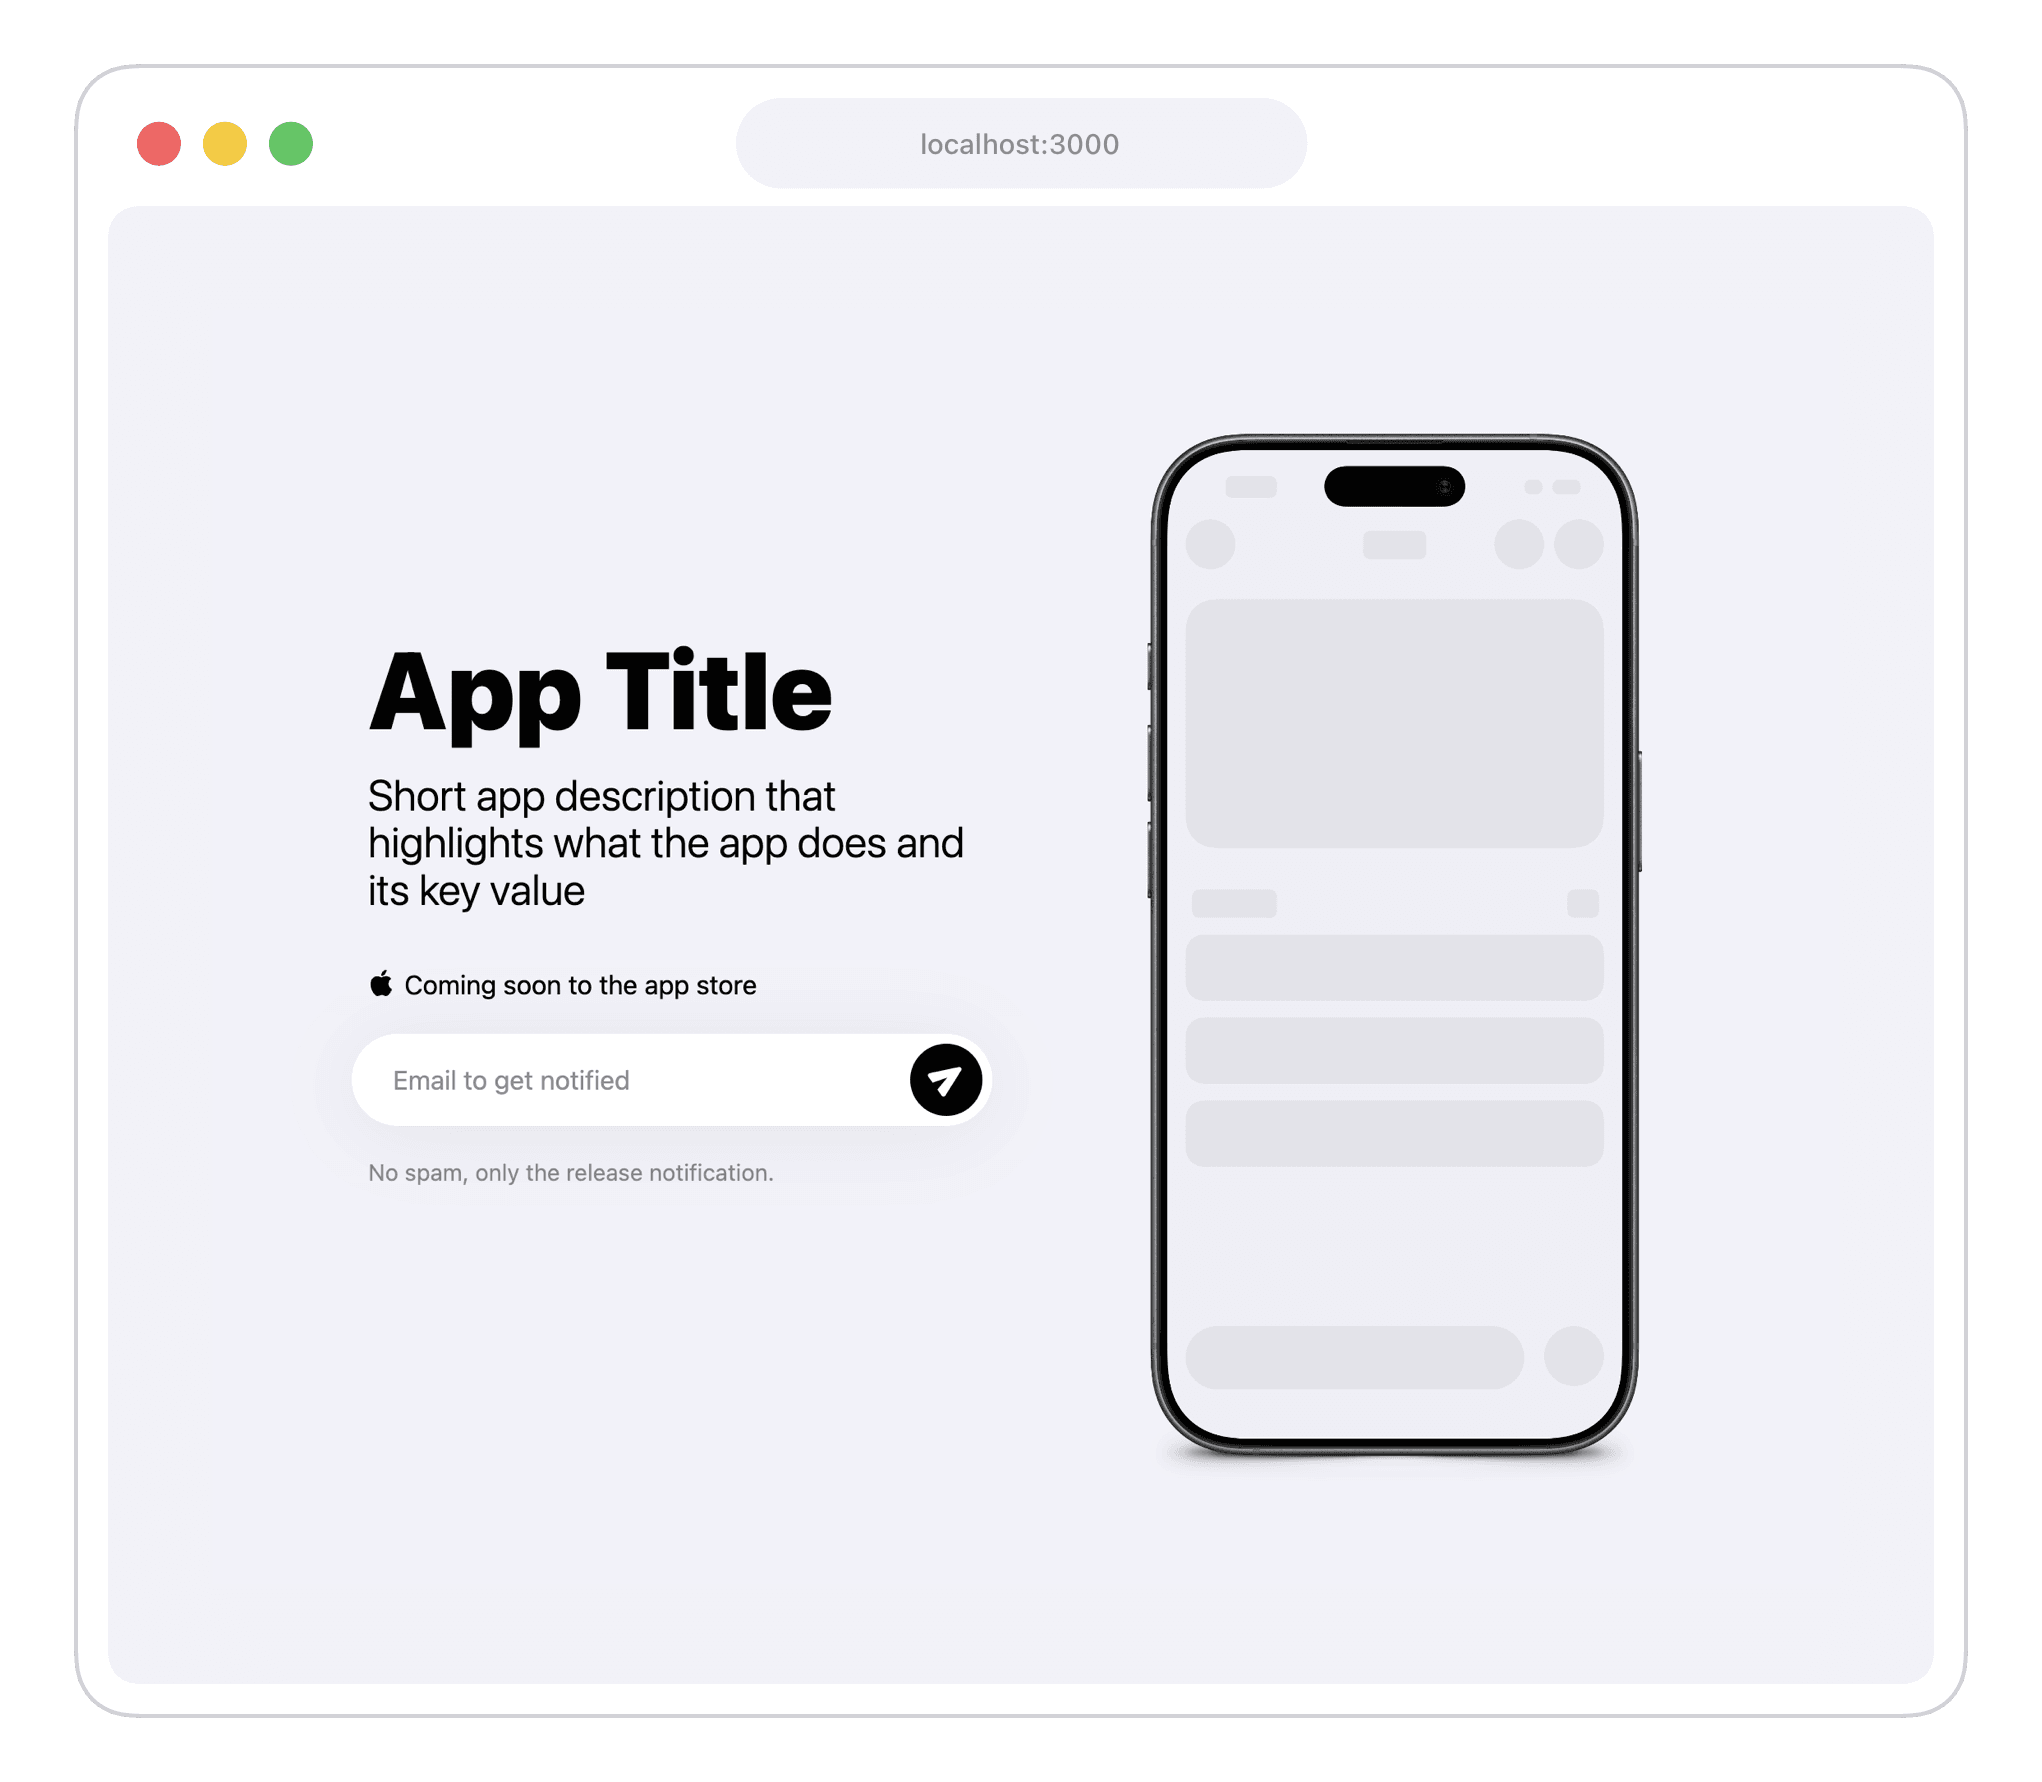
Customize the waitlist page
Along with the title and description, you’re going to need a single good screenshot or a screen recording of your app to showcase something to the people that land on the waitlist page.
Take screenshot or screen recording
Pick the best looking screen you have so far in your app, capture it and put the
file into the /public folder.
Modify the content
Then open the app/(main)/page.tsx and find the <Hero> component that is
inside if (IS_WAITLIST_ENABLED) { ... } condition at the very top of the Page component:
<Hero
  title="App Title"
  subtitle="Short app description that highlights what the app does and its key value"
  media={<Hero.Image src="/screenshot.png" bezel="iPhone 17 Black" alt="" />}
  action={
    <EmailForm
      providerConfig={{
        provider: "loops",
        config: {
          formId: "your-loops-form-id",
        },
      }}
    />
  }
/>
Put the path to the screenshot you took inside the src property of the
<Hero.Image> component and modify the bezel so it matches the iPhone model
you’ve used to capture the screen.
Adjust the title and subtitle properties.
Collecting emails
By default AppView’s waitlist page shows an email form where users can enter their email in order to join the waitlist.
For now, this form only supports one provider - Loops . It’s a minimal email marketing service that has nice UI, all basic features and a free plan to get started.
If you don’t want to use Loops, you can replace the entire <EmailForm>
component with an action button that will link users to any custom page to
collect emails, like Google Forms, Typeform, and similar.
<Hero
  title="App Title"
  subtitle="Short app description that highlights what the app does and its key value"
  media={<Hero.Image src="screenshot.png" bezel="iPhone 17 Black" alt="" />}
  action={<GetNotifiedActionButton href="https://your-email-form-link" />}
/>
Configuring Loops integration
Create an account and project in Loops
Once you create an account, follow their getting started guide to setup domain records and create a new project.
Get form ID
In your Loops project, go to Forms , then to “Settings” and copy your form ID.
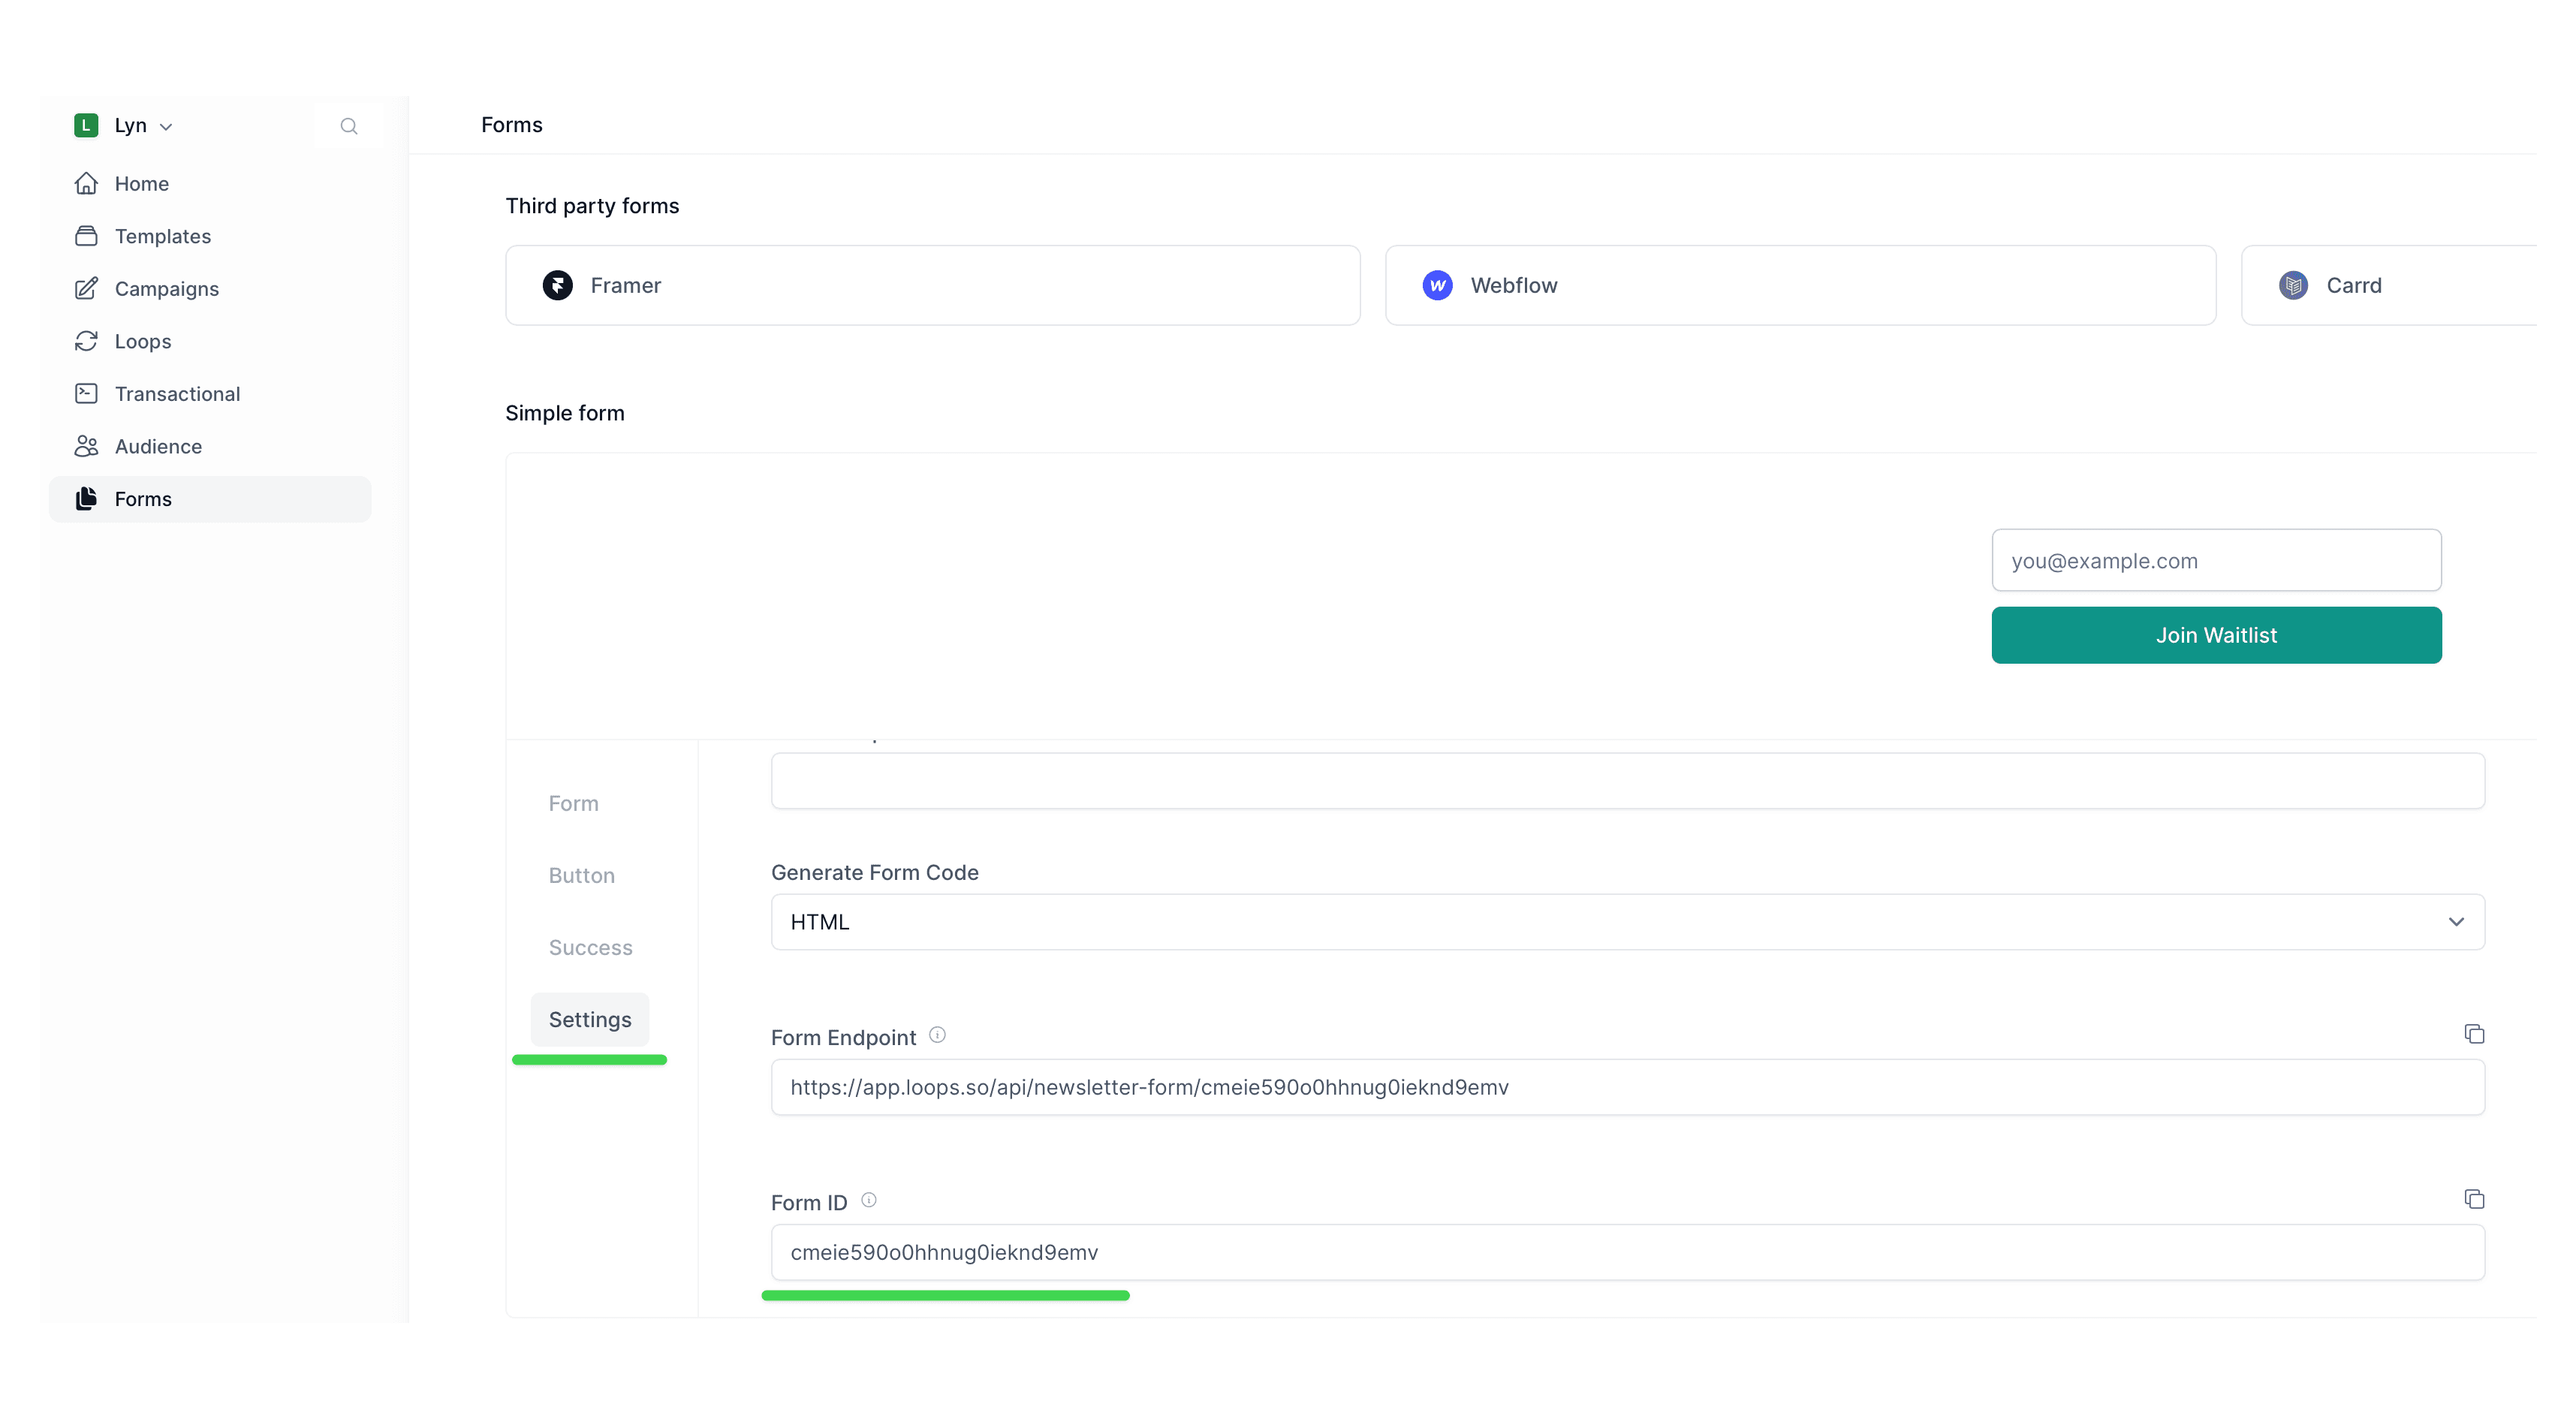
Put form ID into the code
Back in the app/(main)/layout.tsx file, find the <EmailForm> component and
put your form ID into the formId property.
<EmailForm
  providerConfig={{
    provider: "loops",
    config: {
      formId: "your-loops-form-id",
    },
  }}
/>
That’s it! From here, you can deploy your website and start collecting emails right away.
Make sure to also check the <EmailForm> component reference for all available options and properties.